Cree archivos PDF personalizados a partir de una plantilla y una hoja de cálculo de Excel. Siga estos 5 sencillos pasos para rellenar automáticamente cada PDF y, opcionalmente, enviar cada archivo como archivo adjunto de correo electrónico.
Descripción general rápida
Realice una combinación de correspondencia de un PDF cuando necesite crear muchos documentos individualizados (facturas, contratos, certificados, solicitudes) a partir de una única plantilla PDF y una hoja de cálculo de datos. MailMergic rellena los marcadores de posición de su plantilla utilizando los valores de su archivo Excel y genera un PDF por cada fila.
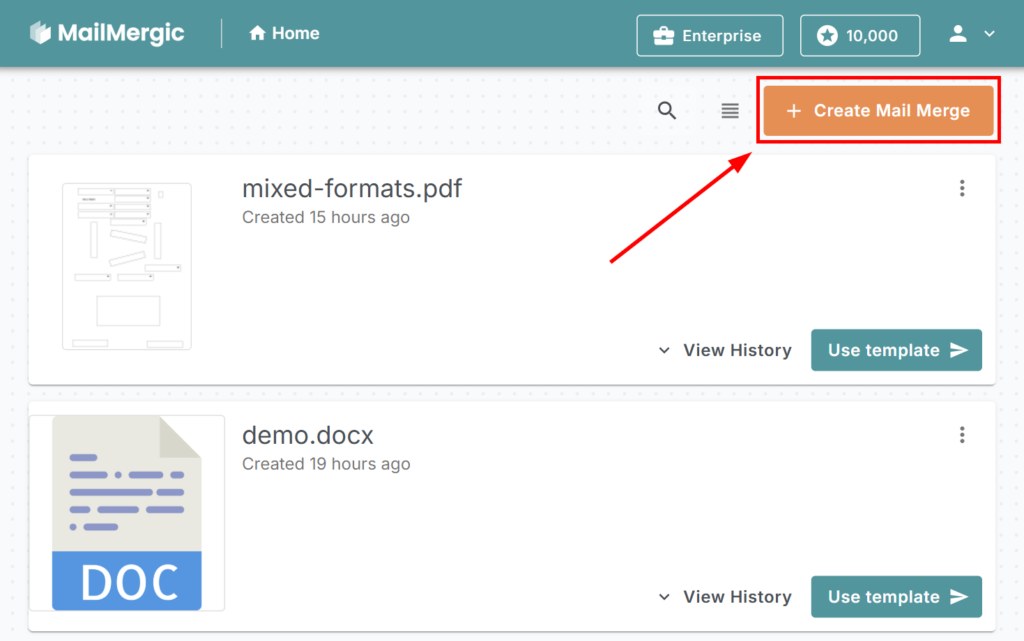
En este artículo, le mostraremos cómo utilizar MailMergic para rellenar automáticamente un archivo PDF en cinco sencillos pasos. Inicie sesión en su cuenta y cree una nueva combinación de correspondencia haciendo clic en «Crear combinación de correspondencia»:
Paso #1: cargue su archivo PDF
En el primer paso, arrastre y suelte o haga clic en la zona de entrega para cargar el formulario PDF (o archivo Word) que desea utilizar como plantilla. No importa si el PDF tiene campos de formulario interactivos o no.
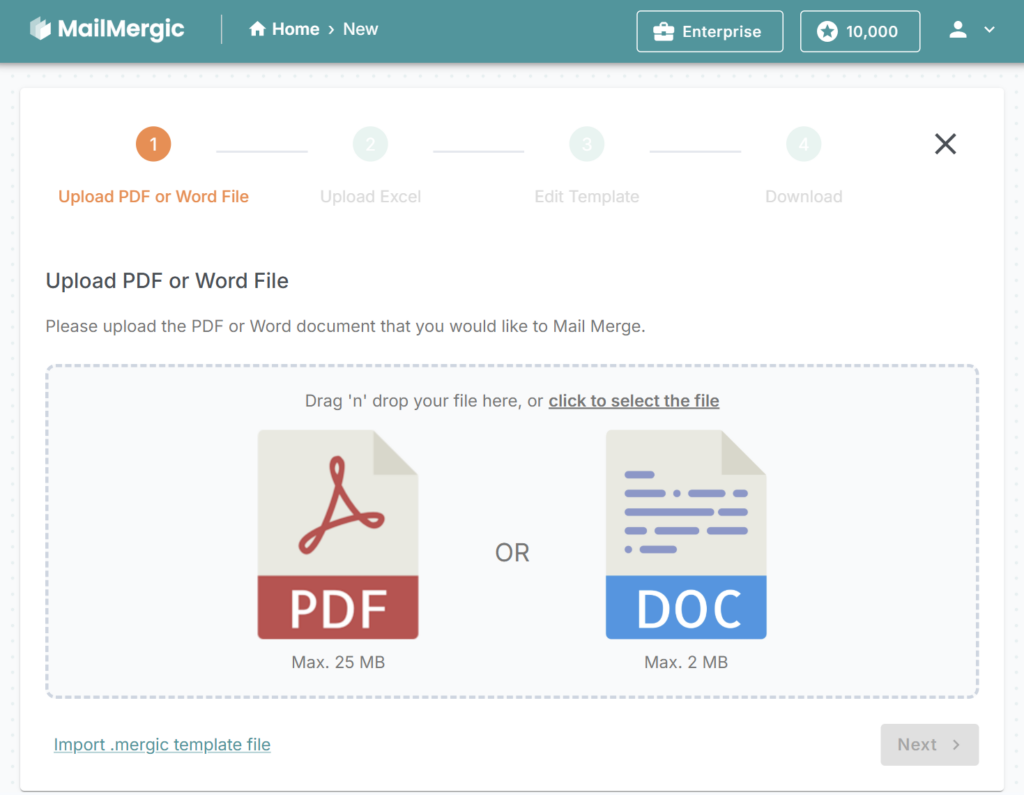
Tan pronto como cargue el archivo PDF, se le dirigirá al segundo paso.
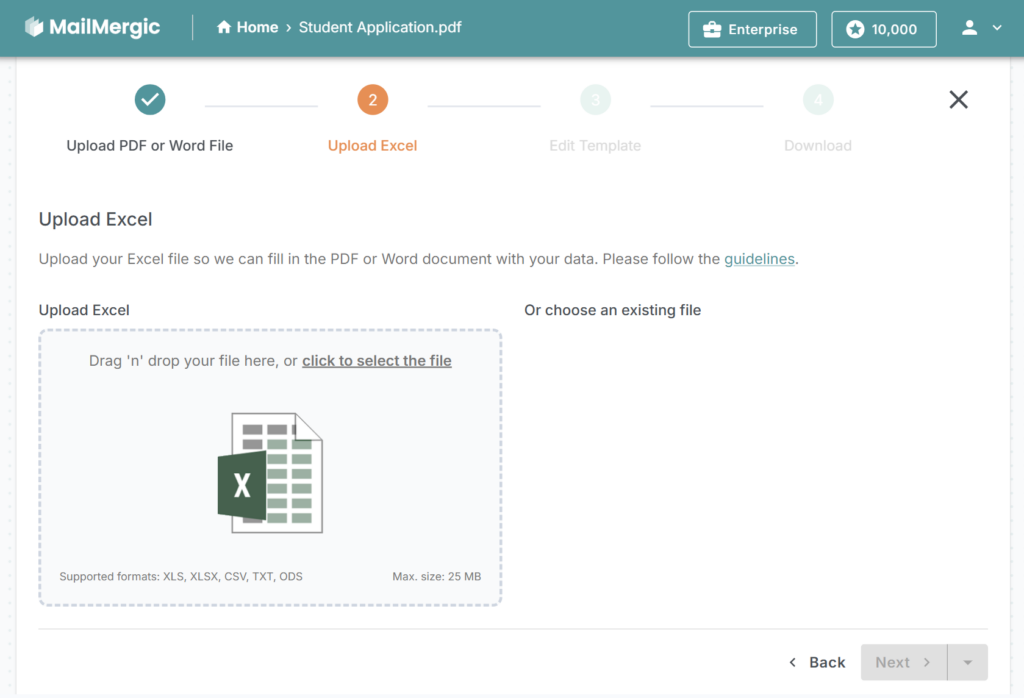
Paso #2: cargue su hoja de cálculo de Excel
Cargue el archivo Excel que contiene los datos para la combinación de correspondencia. Coloque los datos relevantes en la primera hoja y asegúrese de que cada columna tenga un encabezado de columna claro. Estos encabezados se convertirán en los nombres de los marcadores de posición que utilizará en el editor.
Paso #3: arrastre y suelte marcadores de posición en su PDF
El editor muestra todos los encabezados de columna como marcadores de posición. Arrastre un marcador de posición al PDF donde deba aparecer ese valor. Cambie el tamaño, alinee y formatee cada marcador de posición utilizando la barra de herramientas. Puede buscar marcadores de posición, cambiar qué fila es el encabezado y obtener una vista previa del resultado con datos reales. Mantenga el diseño sencillo para obtener mejores resultados.
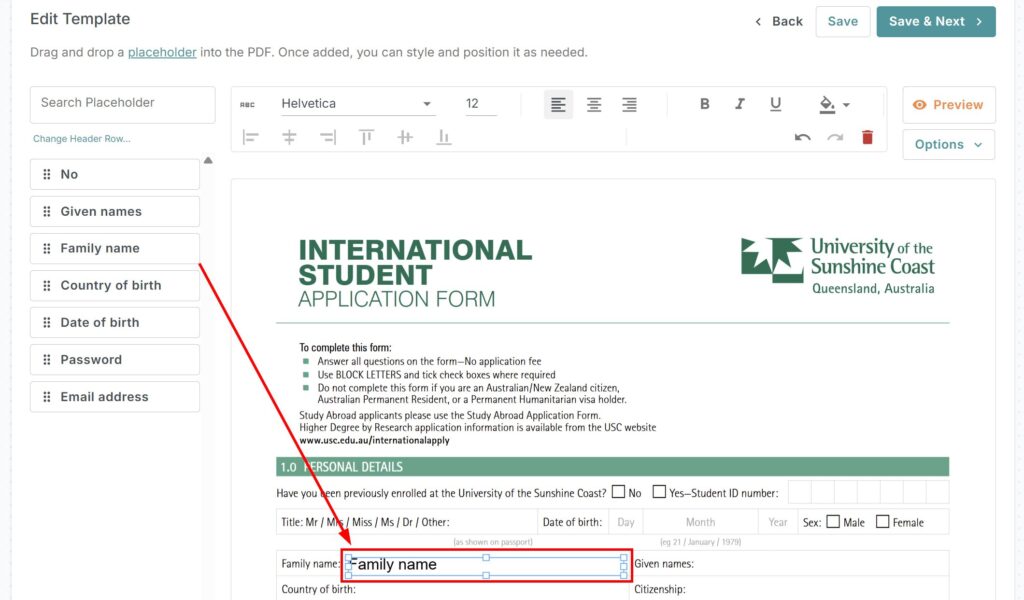
Utilice el campo de búsqueda para encontrar rápidamente el marcador de posición que necesita:
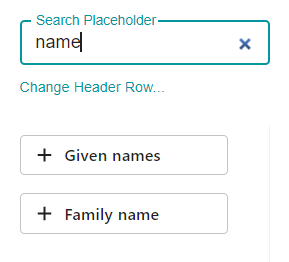
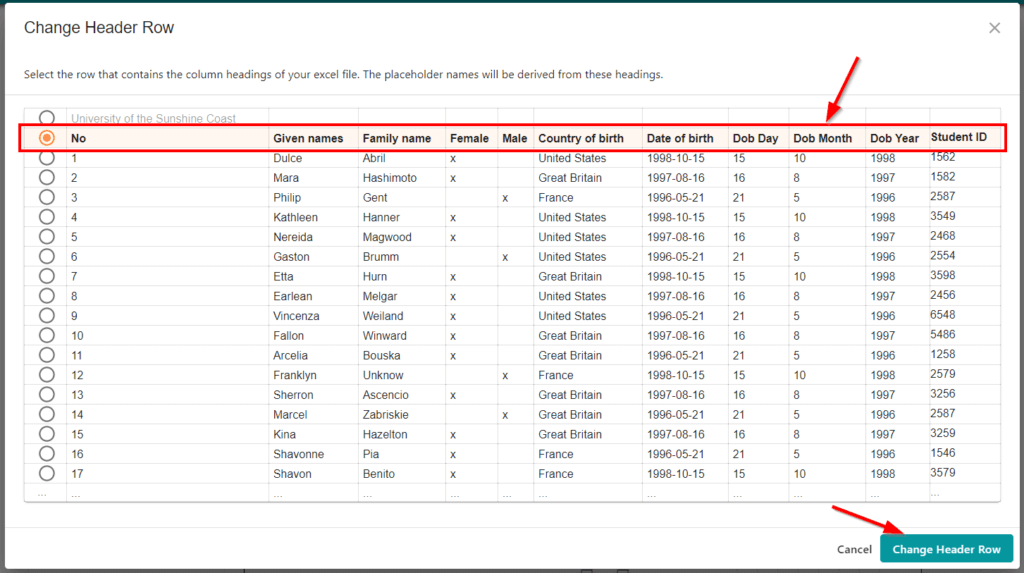
Si no aparece ningún marcador de posición, o si tienen un aspecto incorrecto, haga clic en el enlace Cambiar fila de encabezado…. Se abrirá una vista previa de su hoja de Excel. Seleccione la fila que realmente contiene los encabezados de columna y, a continuación, confirme con Cambiar fila de encabezado. Los marcadores de posición se actualizarán automáticamente en función de su selección.
La barra de herramientas
Arrastre cada marcador de posición al lugar correcto de su PDF y, a continuación, utilice la barra de herramientas para ajustar su tamaño, estilo y apariencia.
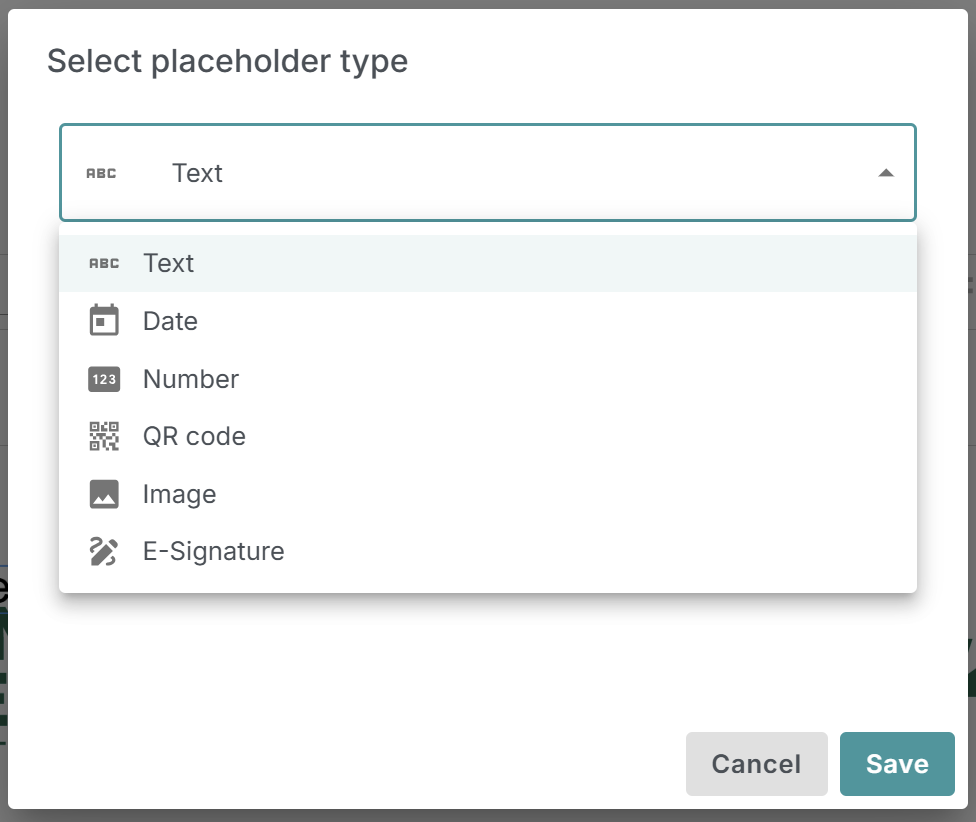
- Tipo de marcador de posición: Cambie un marcador de posición de texto a un código QR, firma electrónica, imagen u otros formatos disponibles.
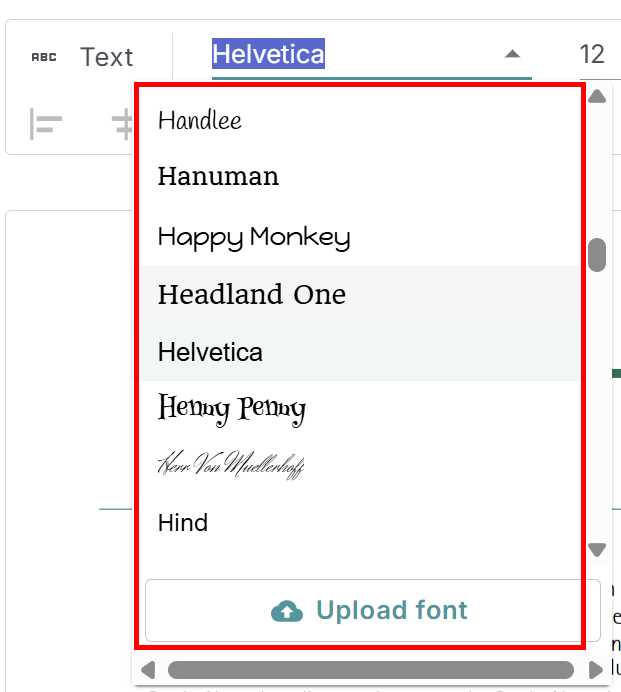
- Familia de fuentes: Elija entre más de 600 fuentes disponibles para dar estilo al texto de su marcador de posición.
- Tamaño de fuente: Establezca el tamaño del texto para sus marcadores de posición seleccionando una opción preestablecida o escribiendo un valor personalizado.
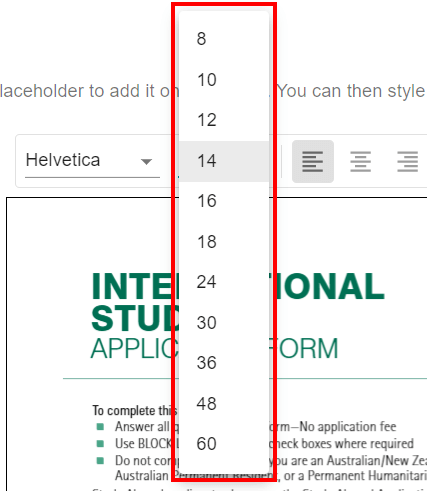
- Alineación del texto: Alinee el texto del marcador de posición a la izquierda, a la derecha o al centro.

- Color del texto: Elija entre colores predefinidos o introduzca un código hexadecimal personalizado para el texto de su marcador de posición.

- Eliminar marcador de posición: Haga clic en el icono rojo de la papelera para eliminar un marcador de posición de su PDF.

Vista previa de sus datos
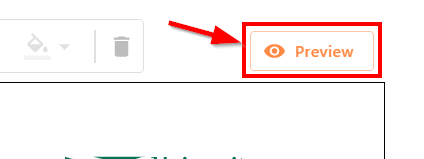
Haga clic en Vista previa para ver cómo se verán sus archivos PDF generados antes de finalizar.
Los marcadores de posición del editor se sustituirán automáticamente por los datos correspondientes de su archivo Excel.
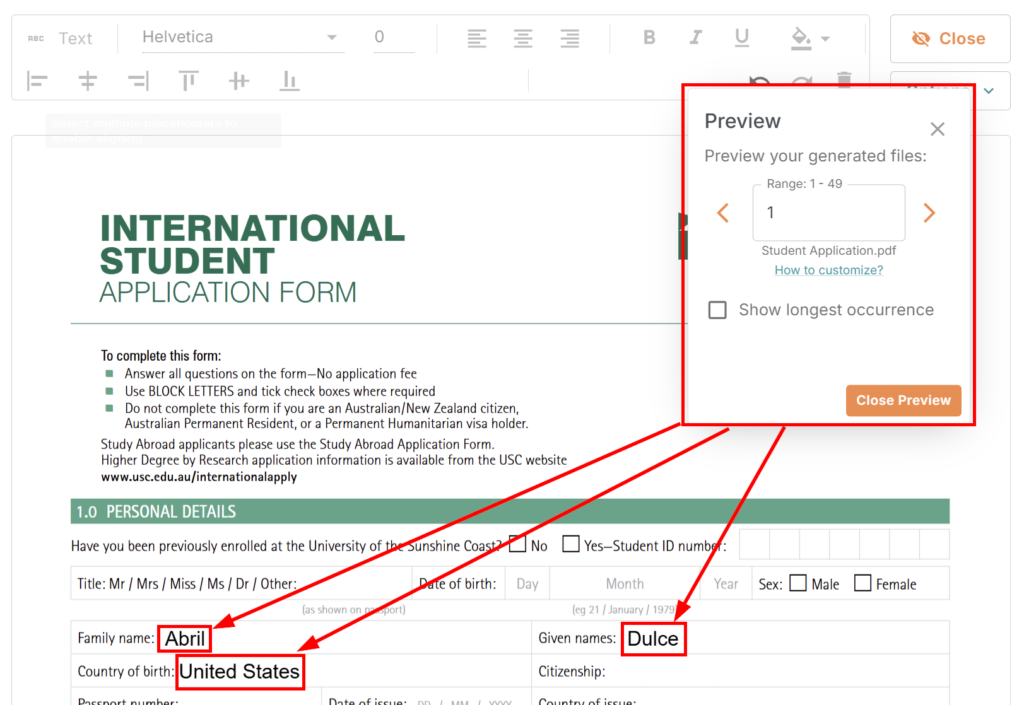
Explore los archivos PDF individuales, cada uno de ellos se rellena automáticamente con los datos de una fila de su archivo Excel.
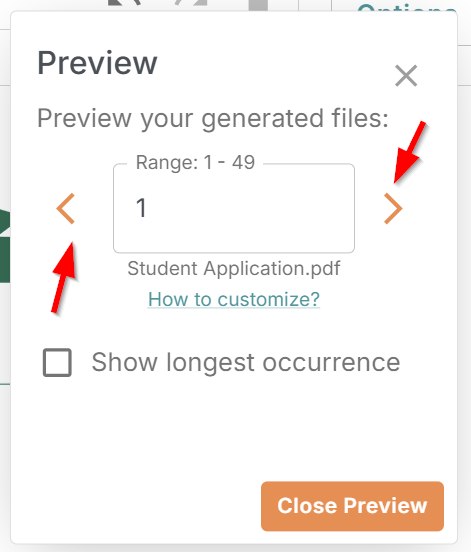
Compruebe que todos los marcadores de posición están colocados y formateados correctamente. Cuando esté satisfecho, haga clic en Guardar y siguiente para continuar.
Paso 4: elija las opciones de salida y correo electrónico
Ahora será redirigido al cuarto y último paso:
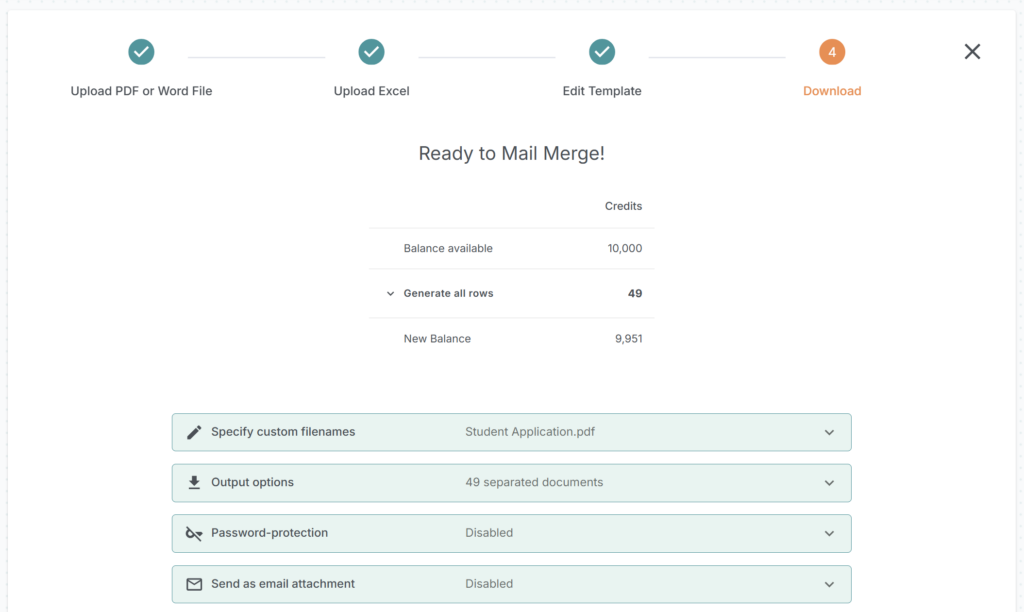
Su saldo
Esta tabla muestra cuántos créditos utilizará para la combinación de correspondencia y cuántos quedan. Un crédito genera un PDF para una sola fila de su hoja de cálculo de Excel. El plan siempre gratuito incluye una asignación mensual de 100 archivos PDF gratuitos, y puede actualizar en cualquier momento si necesita más.
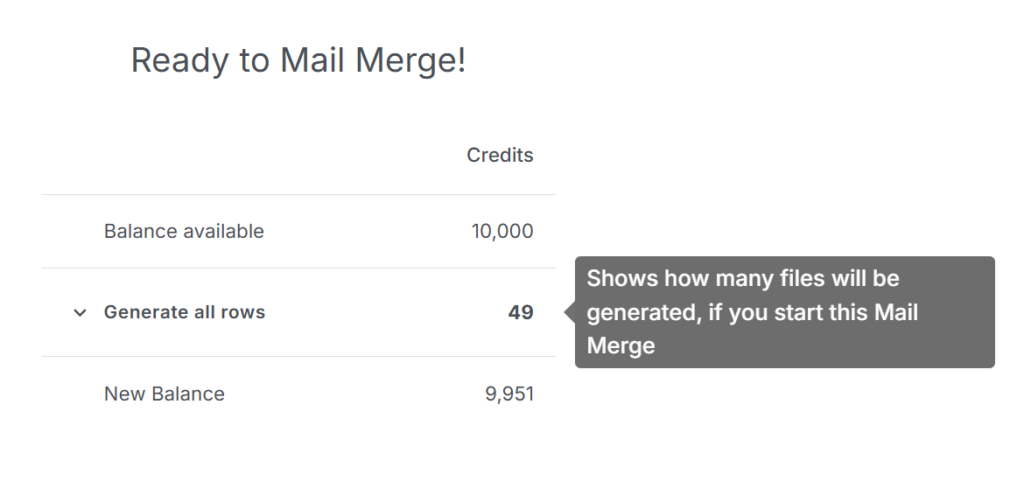
Ajustes
Aquí puede personalizar los nombres de los archivos, las opciones de salida y su plantilla de correo electrónico. Echemos un vistazo más de cerca a cada ajuste en detalle.

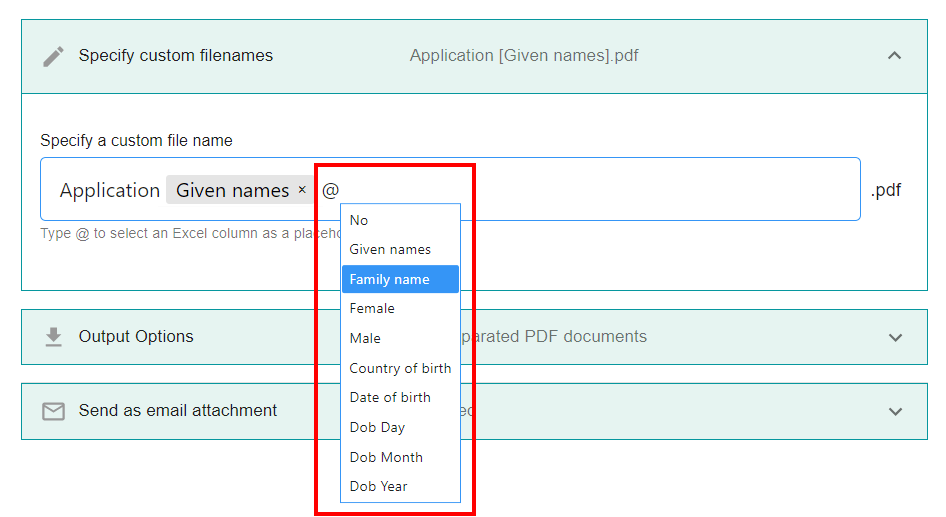
Especifique nombres de archivo personalizados
En esta sección, puede establecer un nombre de archivo personalizado para cada PDF generado. Utilice variables para incluir datos de su archivo Excel: escriba @ y seleccione la columna correspondiente en el menú desplegable. Si su Excel tiene muchas columnas, escriba el nombre de la columna después de @ para restringir la selección. Para eliminar una variable de marcador de posición, haga clic en la x junto a ella.»
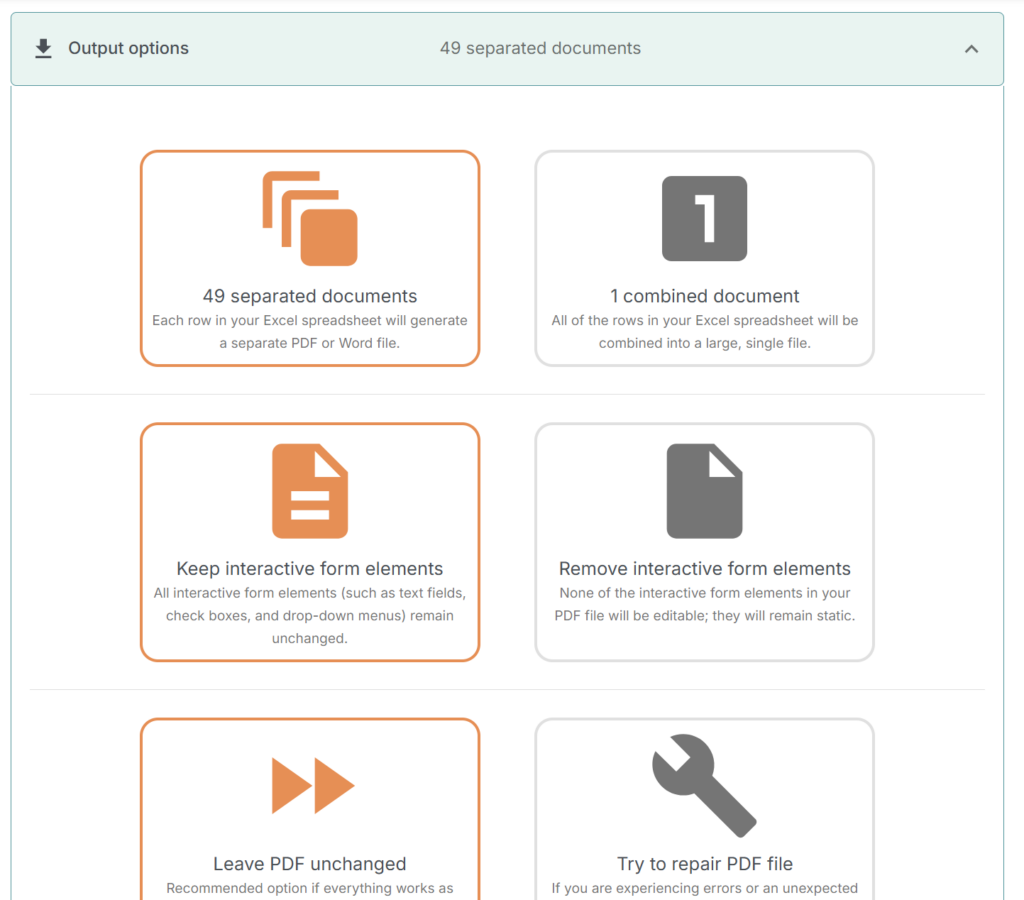
Opciones de salida
Aquí puede personalizar cómo se generan sus archivos PDF. Elija descargar cada PDF individualmente o combinarlos en un solo archivo. También puede decidir si desea mantener o eliminar los elementos de formulario interactivos existentes, como los campos de texto o los botones de opción. Si no está seguro, lo mejor es que se quede con la configuración predeterminada.
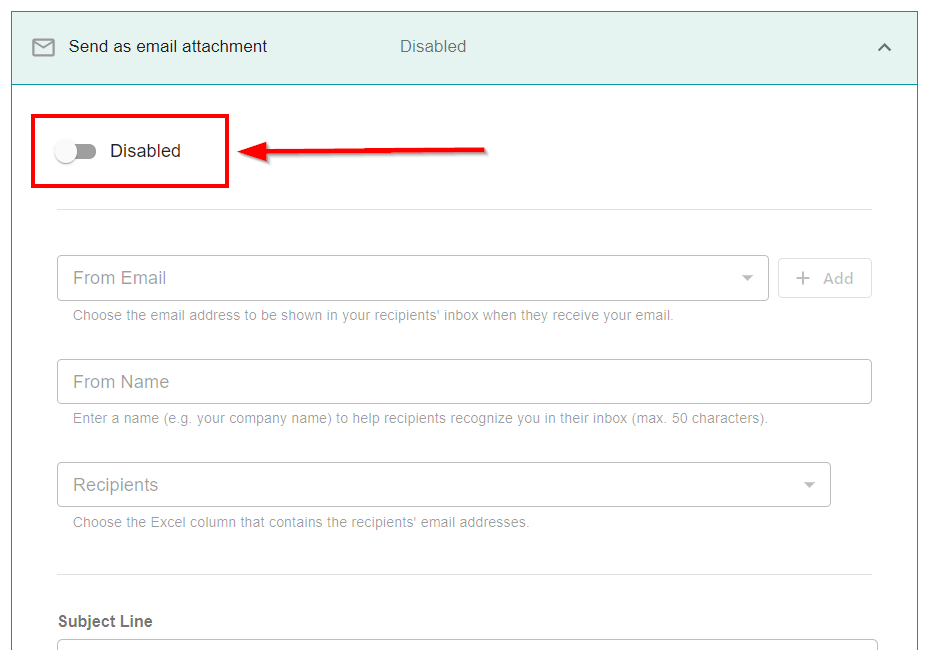
Enviar como archivo adjunto de correo electrónico
En esta sección, puede elegir enviar sus archivos PDF generados como archivos adjuntos de correo electrónico a los destinatarios que figuran en su archivo Excel. Nota: esta función solo está disponible en los planes Pro y Enterprise.
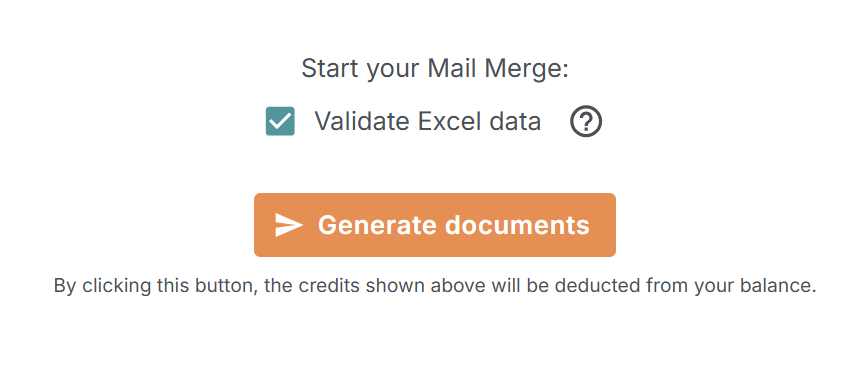
Una vez que todo esté listo, haga clic en Generar archivos PDF para crear sus archivos PDF personalizados:
Espere unos instantes mientras se completa el proceso de combinación de correspondencia.
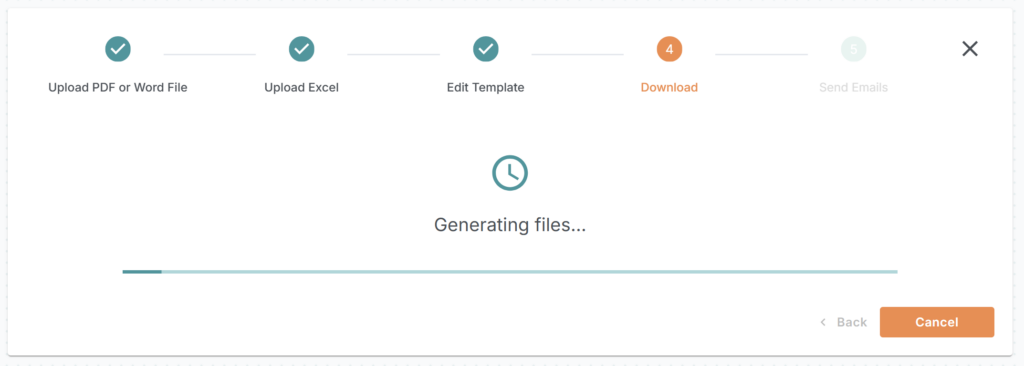
Paso 5: generar y descargar
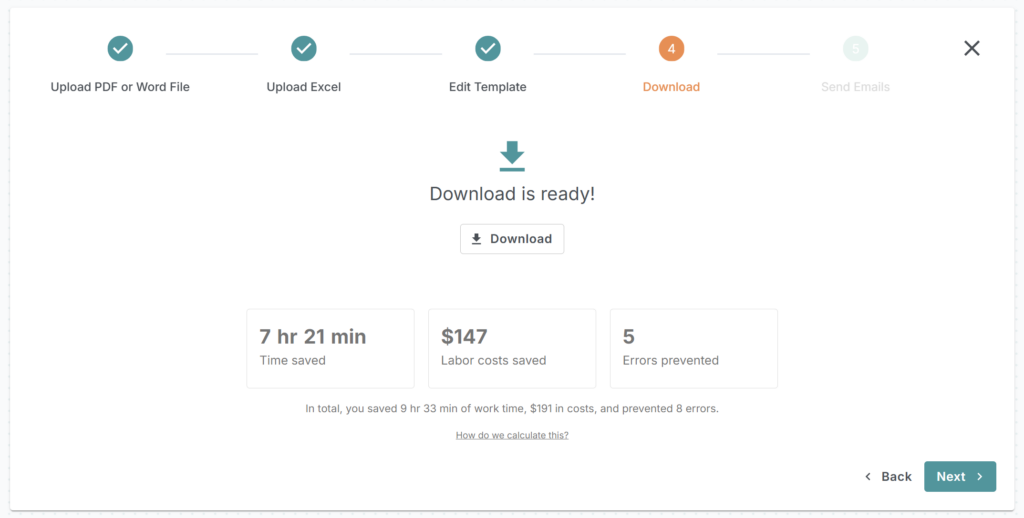
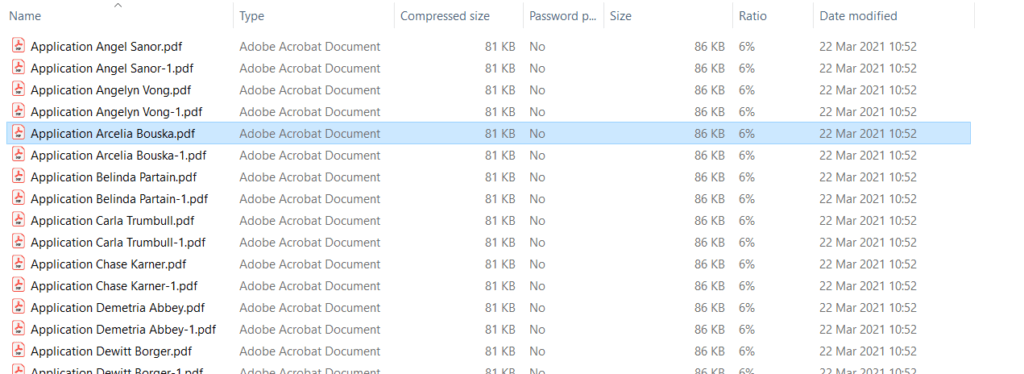
Haga clic en el botón Descargar para guardar sus formularios PDF completados en su ordenador.
El archivo ZIP descargado contiene todos sus archivos PDF, cada uno de ellos rellenado automáticamente con los datos de su hoja de Excel.
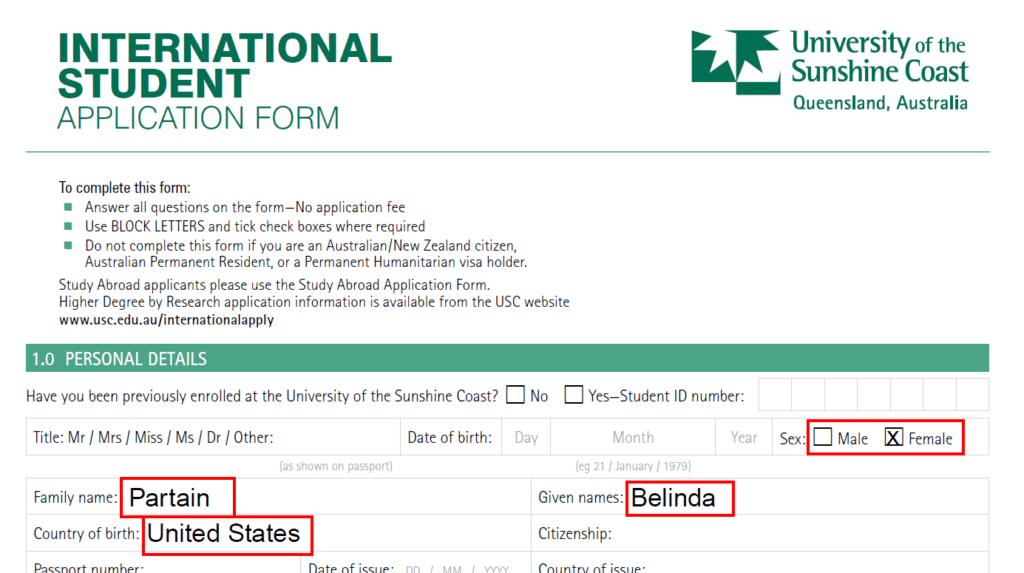
Los archivos PDF se rellenan con los marcadores de posición que añadió en el editor. En la captura de pantalla siguiente, los marcadores de posición rellenados se resaltan en rojo para mayor claridad.
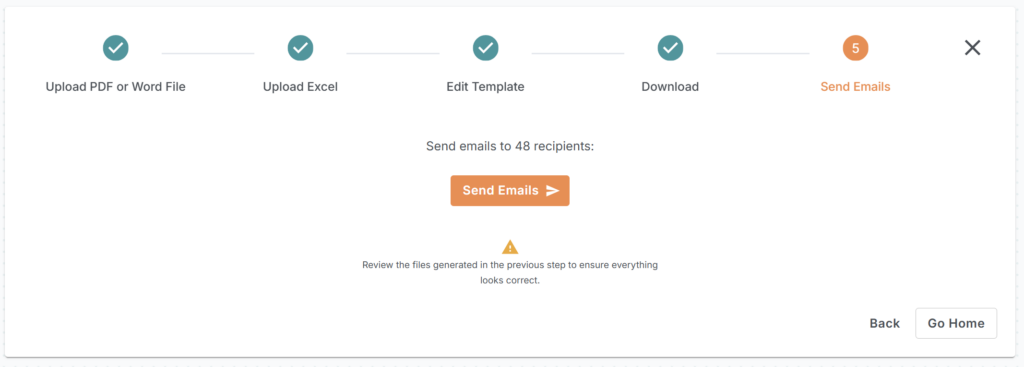
Cuando esté listo para enviar los correos electrónicos, haga clic en Siguiente en el paso 4 del asistente.
En el último paso, haga clic en Enviar correos electrónicos para entregar sus archivos PDF a los destinatarios:
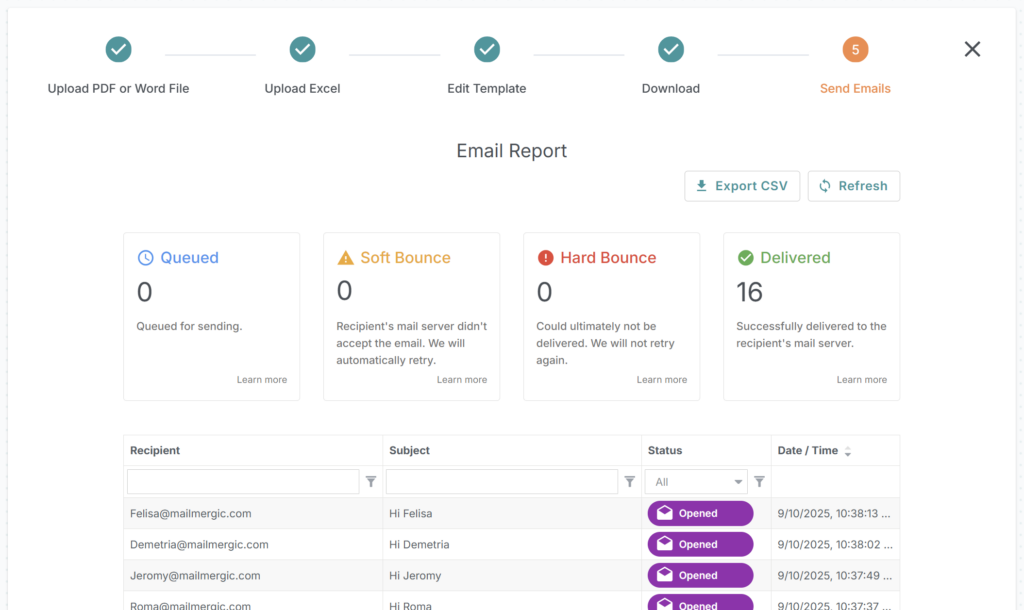
Sus correos electrónicos se generarán y se enviarán a los destinatarios que figuran en su archivo Excel, cada uno con su archivo PDF adjunto personalizado. Puede supervisar el estado del envío en el Informe de correo electrónico:
Consejos para obtener resultados fiables
- Utilice encabezados de columna claros como
FirstName,LastName,InvoiceNumber,Email. - Mantenga cada marcador de posición corto y coherente.
- Realice una pequeña prueba con 2 o 3 filas antes de procesar cientos de registros.
- Utilice la función de vista previa para detectar cambios de diseño antes de generar todos los archivos.
- Si tiene previsto enviar archivos adjuntos por correo electrónico, verifique que la columna
Emailcontiene direcciones válidas.
PREGUNTAS FRECUENTES
P: ¿Necesito campos de formulario en el PDF para que MailMergic funcione?
R: No. MailMergic rellena cualquier plantilla PDF, tanto si contiene campos de formulario como si no.
P: ¿Puedo aplicar contraseñas individuales a cada PDF generado?
R: ¡Sí! En el paso 4, puede establecer contraseñas únicas para cada archivo PDF utilizando variables de su hoja de Excel. Esto garantiza que cada destinatario reciba un documento seguro y personalizado.
P: ¿Cómo puedo detectar errores antes de generar los archivos PDF?
R: Utilice la comprobación de Excel con tecnología de IA de MailMergic para identificar datos faltantes o incoherentes. Esta función ayuda a evitar problemas de diseño, marcadores de posición en blanco o valores incorrectos antes del proceso de combinación de correspondencia.
P: ¿Cómo se consumen los créditos durante una combinación de correspondencia?
R: Se utiliza un crédito para generar un PDF para una fila de su archivo Excel. El plan gratuito incluye una asignación mensual de archivos PDF gratuitos, con opciones de actualización para volúmenes más altos.
P: ¿Puedo enviar archivos PDF como archivos adjuntos de correo electrónico automáticamente?
R: Absolutamente. Puede enviar sus archivos PDF generados a los destinatarios que figuran en su archivo Excel; esta función está disponible en los planes Pro y Enterprise.
P: ¿Puedo combinar todos los archivos PDF generados en un solo archivo?
R: Sí, en Opciones de salida, puede elegir combinar todos los archivos PDF individuales en un único documento combinado.
P: ¿Pueden los marcadores de posición incluir imágenes, firmas electrónicas o códigos QR?
R: Sí, los marcadores de posición no se limitan al texto: puede insertar códigos QR, campos de firma electrónica, imágenes u otros tipos admitidos para cada registro.
P: ¿Puedo añadir campos de firma electrónica a un PDF para que mis destinatarios puedan firmarlo?
R: ¡Sí! Puede añadir campos de firma electrónica a sus plantillas PDF, lo que permite a cada destinatario firmar el documento digitalmente después de que se genere.
P: ¿Cómo me aseguro de que los correos electrónicos lleguen a todos los destinatarios correctamente?
R: Compruebe que todas las direcciones de correo electrónico de su archivo Excel son correctas. Utilice el Informe de correo electrónico para realizar un seguimiento del estado de la entrega e identificar cualquier correo electrónico fallido.
Cree su cuenta gratuita de MailMergic aquí. Si tiene alguna pregunta, nuestro equipo de soporte estará encantado de ayudarle; envíenos un correo electrónico a [email protected]. Gracias por leer, ¡y feliz combinación de correspondencia!
